Affected Products:
Single-Function: CS331, CS431, C3224, C3326, C3426
Multifunction: CX331, CX431, MC3224, MC3326, MC3426
Overview:
This article provides information on how to properly load paper for the above-listed printer models.
This product family has a new paper path design. The paper tray loads from the front then the paper is fed towards the back of the printer, and the output is presented frontwards.
Key points in loading paper
In general, proper tray loading will fix the majority of media feeding problems, such as paper jams, paper edge damage, skew, etc. Here are some key points to remember when loading paper to the printer.

Make sure that the paper loaded in the tray is one of the supported media types for the printer.

Media needs to be biased towards the back of the tray.
- There is a fixed center guide that will slightly angle the stack in the feeding direction.
- Be sure that the bottom of the stack is properly loaded (If the last sheet has been slid out of place and up the center paper guide, a jam will likely occur)

Take note of the printer tray capacity. The tray has a maximum capacity of 250 sheets for standard office papers (Thicker sheets will decrease the input capacity).

Avoid overfilling the tray by checking the stack height limit indicator.There are marks on both side guides to indicate maximum fill line.

Make sure the media stack stays in place during loading and printing. The tray is marked for common sizes, ensure the tick-marks are appropriately aligned.(A) - Press the movable "rear edge restraint" to adjust the position. (Note the bright green touch point at the front of the tray). (B) - Side restraint guides should be adjusted to be snug, but not too tight so as to pinch or buckle the media. (Note the bright green touch point)

Expand the tray frontwards for media types longer than A4 (eg., Folio/Oficio/Legal).

For Envelopes, they can be fed from the tray but is limited to 5 envelopes or less only. Envelopes may also be fed using the manual feed slot, located directly above the tray.

Should a paper jam error occur;
- Some jams can be accessed from the front by removing (A) - Manual feed guide is removable for jam access. This is rarely needed?(B) - Remove the primary tray
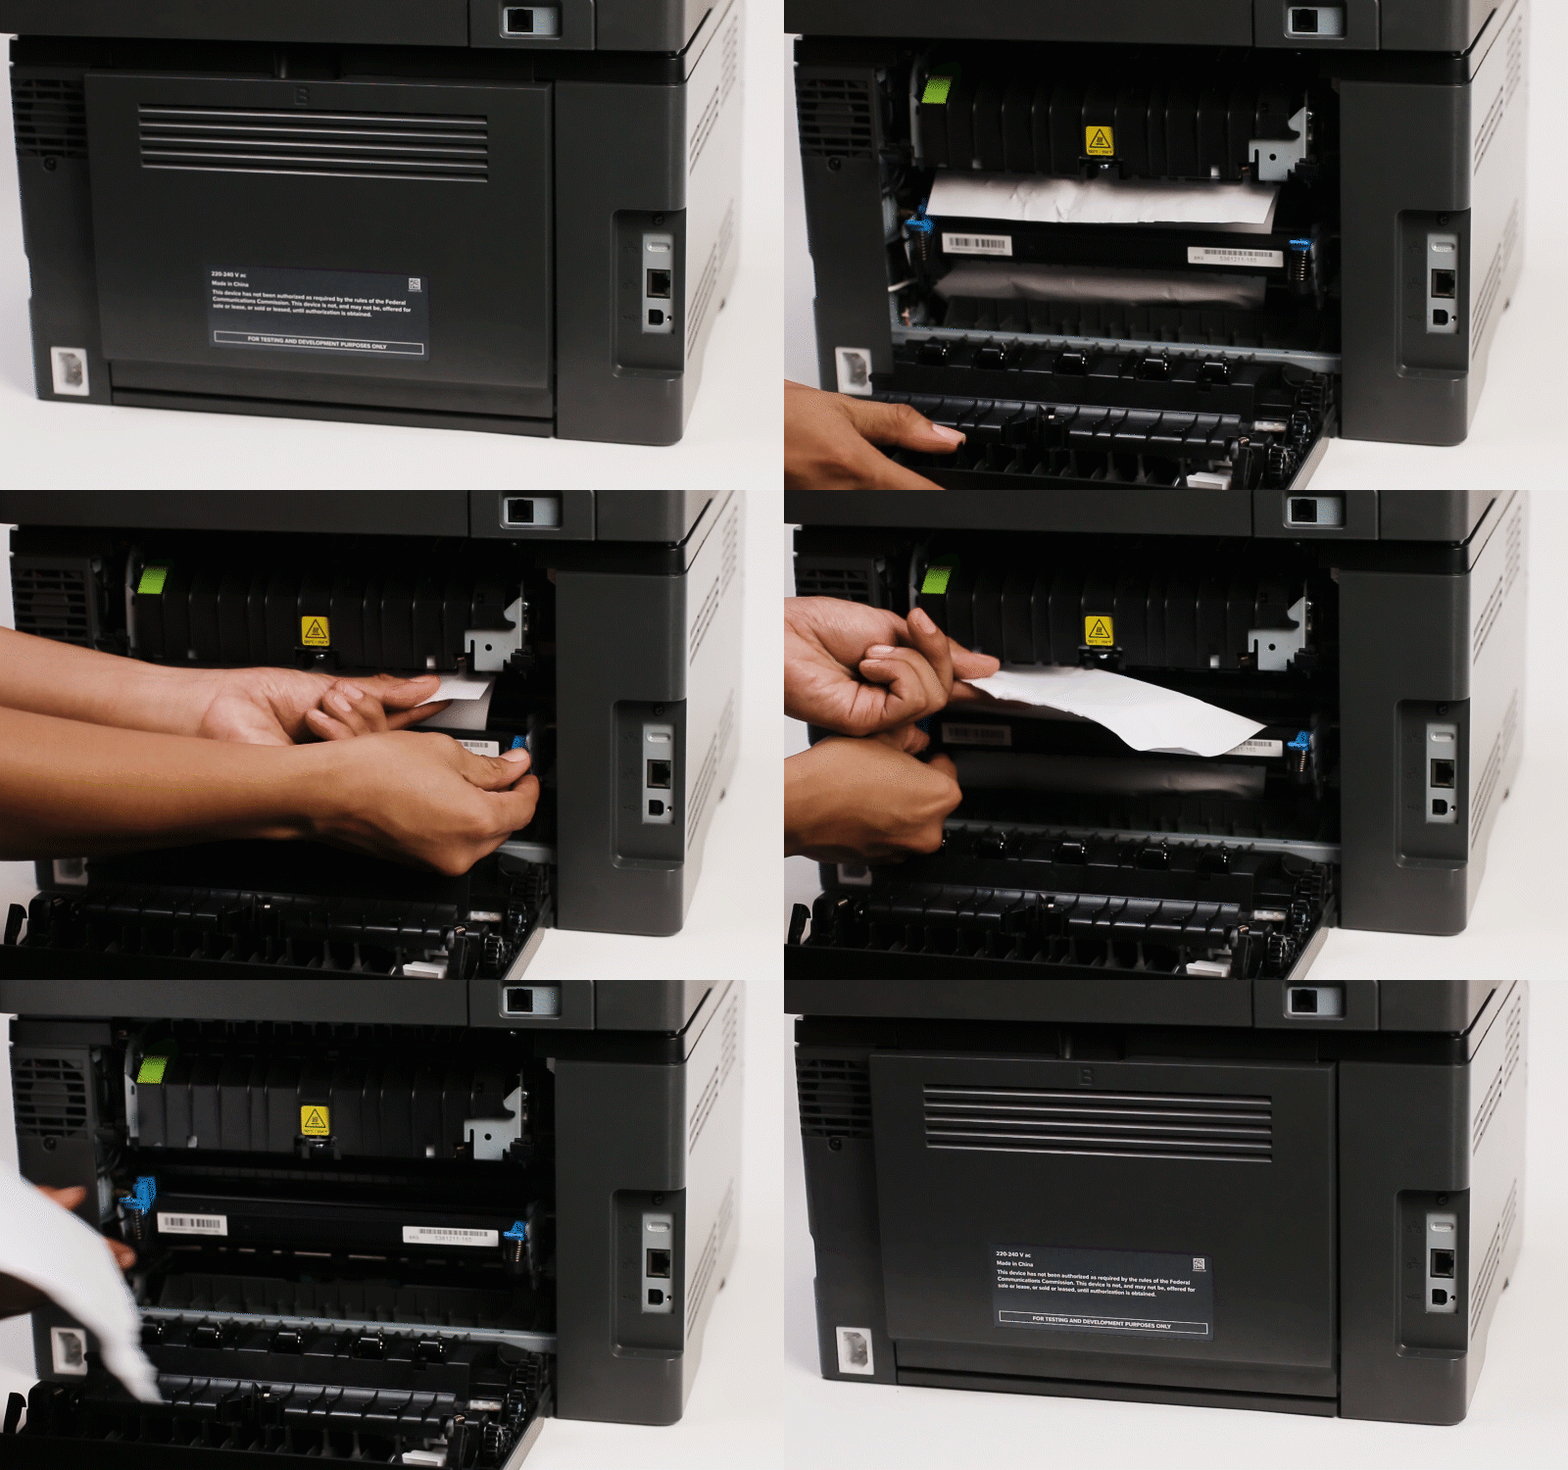
- Other jams will need to be cleared from the back of the printer:
- Open the rear door to access jams in the fuser/exit area.
- There are (2) blue levers to open the image transfer nip to help clear jams if needed.
- Closing the door automatically will reset the paper feed nips to be ready to print.

LEGACY ID: FA1294