The following workflow shows the general process for setting up printers in the Fleet Management web portal:
Using the Printer Enrollment Tool

Log in to the Lexmark Cloud Services website.
Download and run the Printer Enrollment Tool.
Discover the printers in your network.
Enroll the printers.
The printers are shown in the Fleet Management web portal.
Notes:
- For printers with firmware version 074.xx or earlier, the system installs the Printer Agent application in the printer. The Printer Agent polls the Lexmark Cloud Services website regularly to monitor configuration changes or other requests.
- For printers with firmware version 075.xx or later, the system uses the Native Agent to communicate with Lexmark Cloud Services.
- For more information on the firmware version, see Viewing the printer firmware version.
Using the Fleet Agent
Log in to the Lexmark Cloud Services website.
Create a Fleet Agent, and then download it.
Run and activate the Fleet Agent.
Discover and enroll printers.
Note: The Fleet Agent uses an open connection to Lexmark Cloud Services.
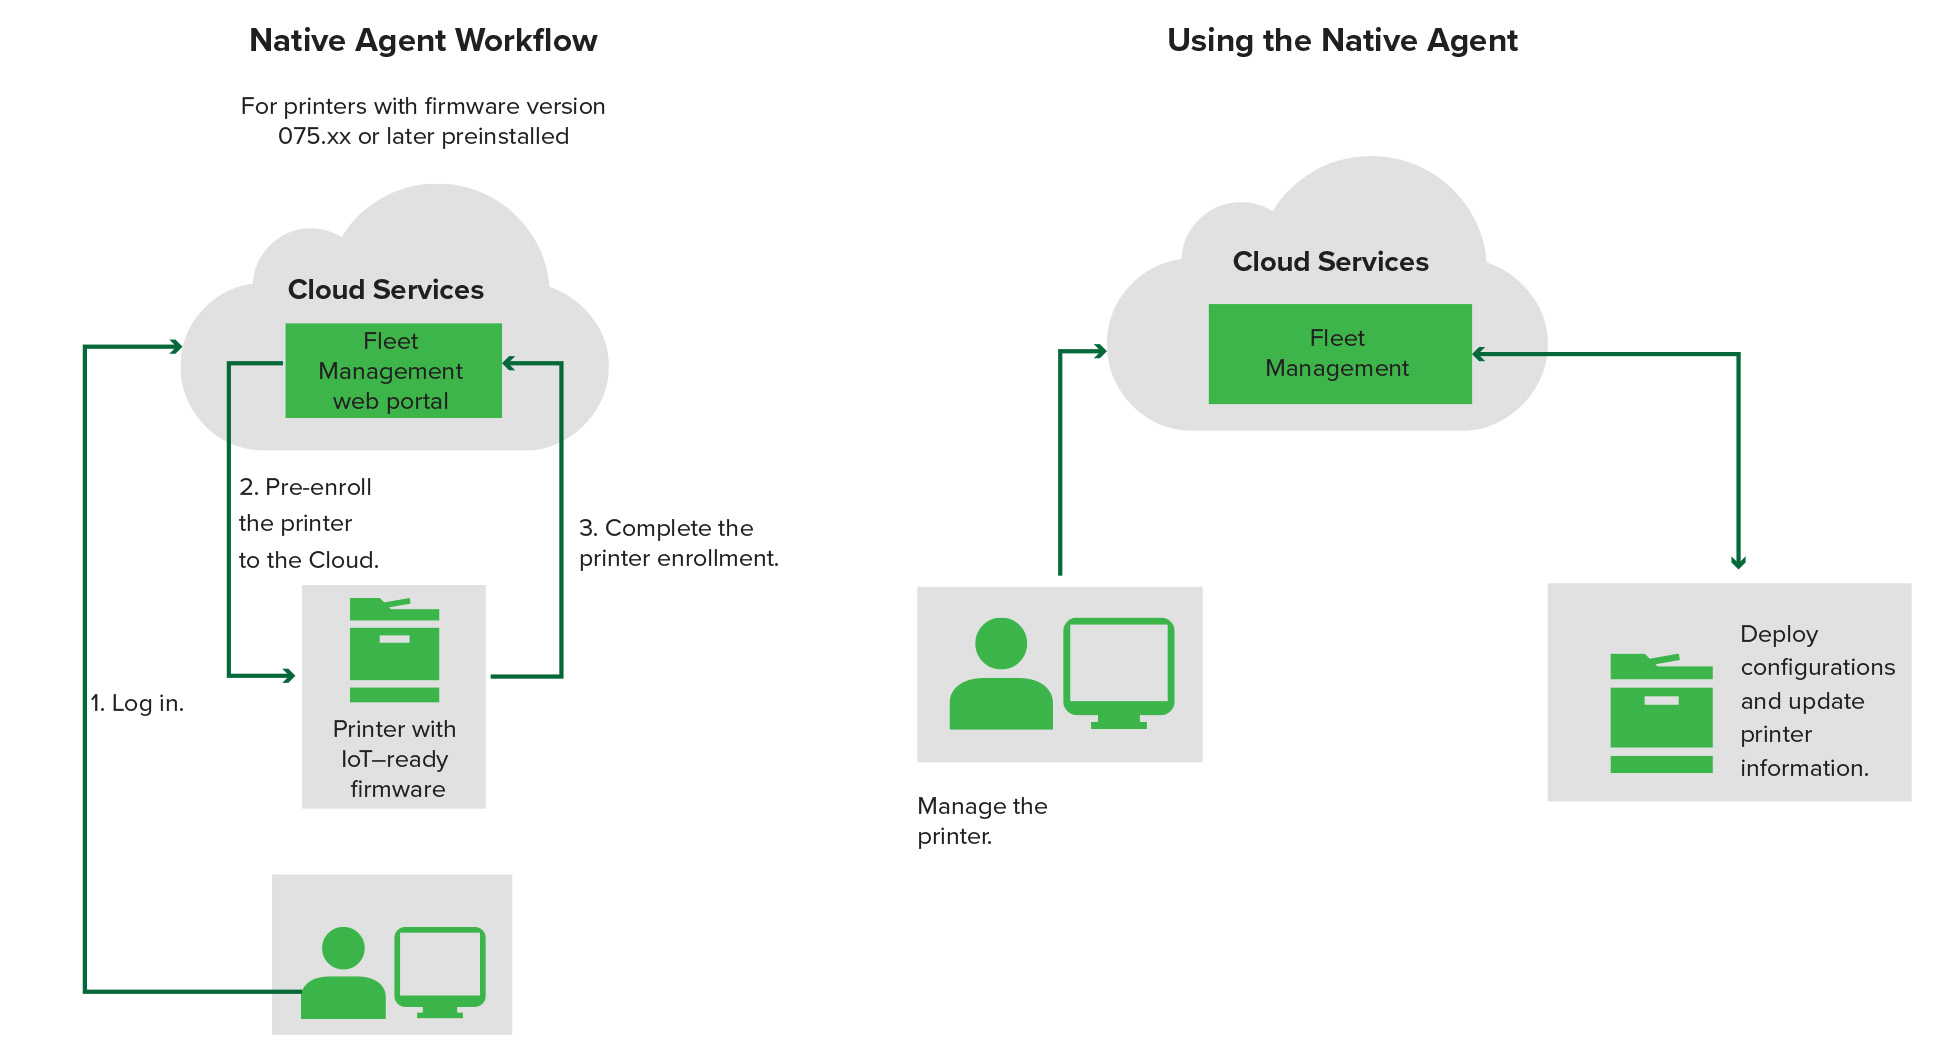
Using the Native Agent
Note: This workflow applies only to supported printers with firmware version 075.xx or later preinstalled in the factory. Printers manufactured in late 2019 or later that are not preinstalled with version 075.xx in the factory must be later upgraded to version 075.xx or later. For more information on supported printer models, see Supported printer models.
Log in to the Lexmark Cloud Services website.
Pre‑enroll the printers.
From the Embedded Web Server or the printer control panel, enter the enrollment code to complete the enrollment.
Notes:
- One enrollment code per organization is assigned for all supported printers.
- To skip the pre‑enrollment process, obtain the enrollment code from the Embedded Web Server. For more information, see Enrolling printers from the Embedded Web Server.
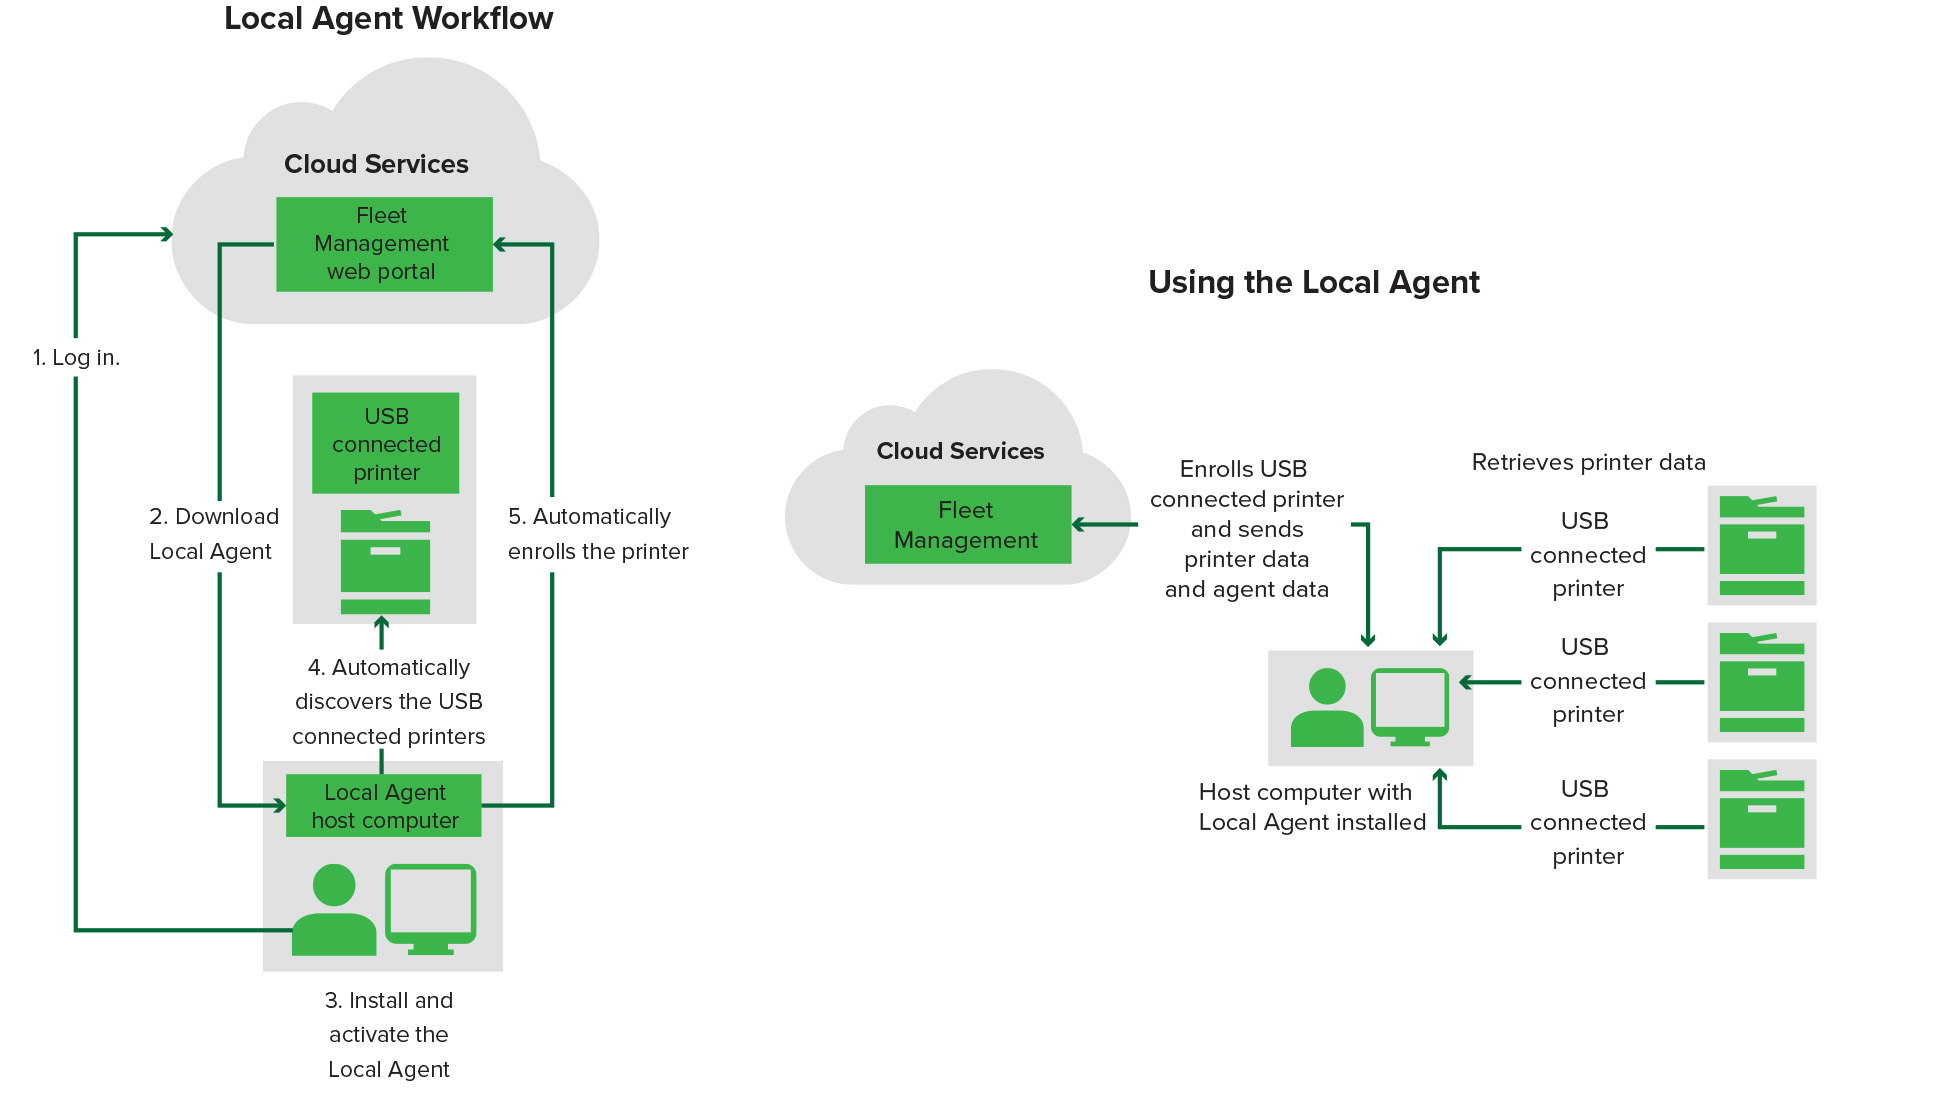
Using the Local Agent
Log in to the Lexmark Cloud Services website.
Download the Local Agent.
Run and install the Local Agent.
Get the activation code from the Lexmark Cloud Services website and activate the Local Agent.
Note: When installed and activated, the Local Agent automatically enrolls the printers connected through USB.
After enrollment, the enrolled printers are listed on the Fleet Management web portal home page. The IP addresses appearing on the Fleet Management home page are the IP addresses of the host computers.
From the Fleet Management web portal, you can create and deploy printer configurations, view printer information, and request printer logs.
Note: You cannot create and deploy configurations, and request printer logs for printers enrolled through Local Agent.